Disable AutoRun / AutoPlay Using Local Group Policy Editor
Step 1: Pull up the Run dialog box (Win + R) and type gpedit.msc. Hit Enter to launch the Local Group Policy Editor.
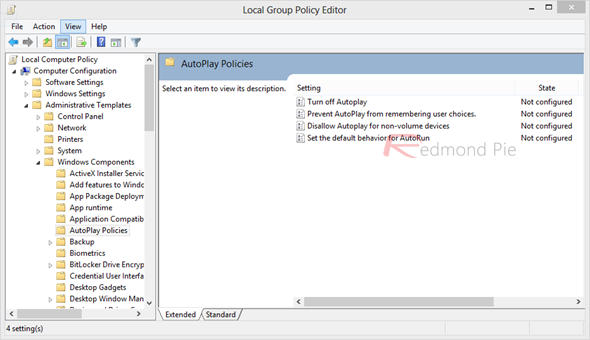
Step 2: Within Group Policy Editor, navigate to this location:
Computer Configuration > Administrative Templates > Windows Components > AutoPlay Policies

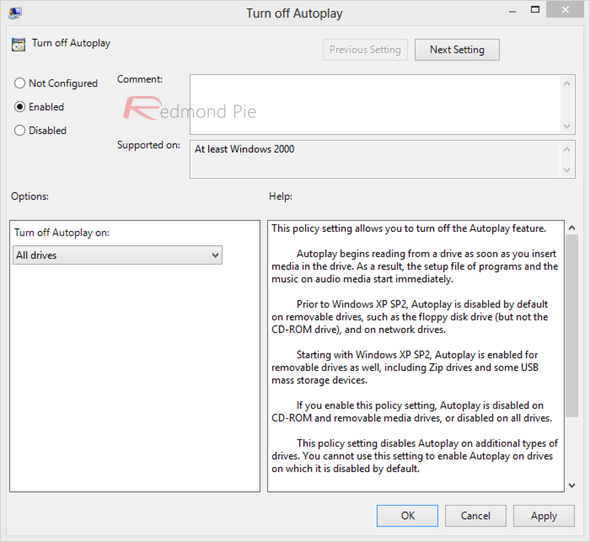
Step 3: Double-click the Turn off Autoplay option to edit its settings, select Enabled, and then select All drives in the options panel below. Hit Apply when done.

Step 4: Restart your computer.
That’s it; the AutoRun feature has been completely disabled for all users, and for all drives that connect to your machine.
Disable AutoRun / AutoPlay Using Registry Editor
Should you have a version of Windows that doesn’t ship with Local Group Policy Editor, follow these instructions.
Step 1: In the Run dialog, type regedit to launch the Registry Editor.
Step 2: Depending on whether you want to disable AutoRun for all users or just for the current one, navigate to either of these registry keys (the first one is for all users):
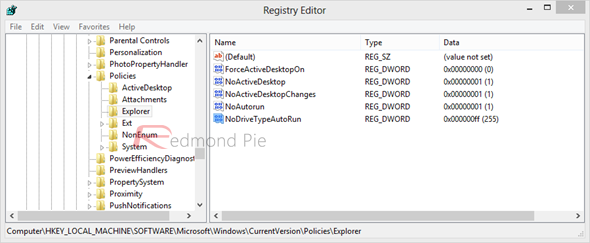
HKEY_LOCAL_MACHINE\Software\Microsoft\Windows\CurrentVersion\Policies\Explorer\
HKEY_CURRENT_USER\Software\Microsoft\Windows\CurrentVersion\policies\Explorer\
Step 3: Within this subkey, locate the setting labeled “NoDriveTypeAutoRun”. If it doesn’t exist, create a new 32-bit DWORD with this name and assign it the hexadecimal value 000000FF(Decimal 255).

Step 4: Restart the computer.
The DWORD defined above will disable AutoRun for all drives and devices, and will have the same effect that you would’ve gotten through Local Group Policy Editor.
Should you want to restore AutoPlay ever again, just reverse the changes that you made in these steps, and you should be good to go.
No comments:
Post a Comment