Tuesday 8 March 2016

Step by Step Procedure to Migrate sites from MOSS 2007 to SharePoint 2010

Hi All,

In this post, I will first explain how to migrate sites from MOSS 2007 to SharePoint 2010. 

Steps for Migrating MOSS 2007 site to SharePoint 2010

1.    We will migrate a simple site in MOSS 2007 to SharePoint 2010. Here is the screenshot of the site in MOSS 2007


2.      Set the content database for this site to READ ONLY before taking backup. 
       To do this, open SSMS and select the content database


3.       Right click on database and select properties
4.       Under Options tab, set the database state to be READ ONLY as shown below


5.    Once this is done, click OK to save changes. The database will be grayed out indicating that it is in READ ONLY mode


6.       Now, backup the database


7.    Once the backup is done, restore this backup on SQL Server that is connected to SharePoint 2010 Farm. I have SQL Server 2008 R2 that is connected to SP 2010 farm.
8.    To restore the MOSS 2007 content database to SQL Server 2008 R2, open your SQL Server 2008 R2 in SSMS
9.      Right click on Databases and select Restore database
10.   Select “From Device” option under “Source for restore”. Then Select the backup file


11.   Provide the name of database under “Destination for restore” => “To database”. FYI, I restored my MOSS 2007 content database to SQL Server 2008 R2 as “WSS_Content_MOSS2007ContentDatabase”
12.   Now, go to central administration page for SharePoint 2010 and create a new web application. Do not create any site collections for this web application as we will delete content database for this web application. The name of content database for this web application is “WSS_Content_TempWebApp_4444”.


13.  Delete the content database for newly created web application (http://saiabhilash:4444/) using PowerShell command
      
      Dismount-SPContentDatabase -Identity "WSS_Content_TempWebApp_4444"

14.  Now, attach the MOSS 2007 content database to this web application using PowerShell command
Mount-SPContentDatabase -Name WSS_Content_MOSS2007ContentDatabase -DatabaseServer SAIABHILASH\SHAREPOINT -WebApplication http://saiabhilash:4444/
15.  Once this done, verify that the MOSS 2007 content database is successfully attached to SharePoint 2010 web application (Manage Content databases page in Central Administration)


16.  Depending on your project requirements, you may need to perform additional tasks
a.       Update Web.config with
                                                   i.      Connection strings to database (In case custom database is used)
                                                 ii.      Safe controls for Dll’s
b.      Update Visual Studio code to VS 2010 (Applicable if 12 hive was used by your code. This needs to updated to 14 hive)
c.       Update master page and page layouts to use dll’s of version 14.0.0.0. Note that we still have 12.0.0.0 version for Master page and Page layouts even after migration
17. This is it. Once this is done, we see the migrated site in SharePoint 2010 as shown below J


18.  We still see that UI is still in 2007 format. Use Visual Upgrade to see the updated UI (Site Actions รจ Visual Upgrade)


19.   Select “Update the user interface” tab and click OK to see SharePoint 2010 UI.


20.   Welcome to SharePoint 2010! J


MOSS 2007 to SharePoint 2013: Migration using Database Attach Method

In one of my projects, I got a chance to work on the migration where we have migrated contents from MOSS 2007 to SharePoint 2013 environment with the huge content of about 40+ databases and 11000+ sites. We had decided to start the upgrade process using the database attach method as this is the only supported method for upgrading from MOSS 2007 to SharePoint 2013 without much of complications.
 
Let me tell you, we cannot upgrade the content directly from MOSS 2007 release to SharePoint 2013. The changes between versions are too great, and the hardware requirements differ so much between versions that a direct upgrade is not possible or supported. However, we can perform a series of database-attach upgrades to first upgrade our content to SharePoint 2010 Products and then to SharePoint 2013. The upgrade method is almost similar from MOSS 2007 to SharePoint 2010 and then from SharePoint 2010 to SharePoint 2013.
 
This blog describes how to perform these sequential database-attach upgrades from MOSS 2007 to SharePoint 2010 and then to SharePoint 2013.
 
Run preupgradecheck in MOSS 2007 Server
Preupgradecheck will provide us the invaluable information regarding the SharePoint 2007 farm and actions that may be required to be taken prior to upgrading to SharePoint 2010/SharePoint 2013
Run the preupgradecheck as below in command prompt:
stsadm.exe -o preupgradecheck
 
Once you get “Operation completed successfully”, it will launch the “SharePoint Products and Technologies Pre-Upgrade Check Report”. It can also be located under the following location;
%COMMONPROGRAMFILES%\Microsoft Shared\Web Server Extensions\12\Logs\
 
Analyze the report and Fix the following settings:
• Identify any third party components used and deploy them to SharePoint 2010 and SharePoint 2013 site. E.g. Nintex, 3rd party features, including web parts, solutions and custom workflows
• Setup Incoming/Outgoing email settings in SharePoint 2010 and SharePoint 2013environment
• Modified Web.Config entries
• Configure Alternate Access Mappings (AAM)
• Find the missing webpart, event receivers or features if any and delete them
 
Take the Content Database Backup from MOSS 2007
Set the databases to read-only before taking backups.
• On the MOSS 2007’s database server, click Start, point to All Programs, Microsoft SQL Server, and then click SQL Server Management Studio.
 
SQL-Server-Management-Studio
 
• Traverse to Databases node by expanding the tree
• Right-click the name of the database that you want to set to read-only, and then click Properties.
• In the Properties dialog box, click the Options tab.
• Under State, select the Database Read-only to True, and then click OK
 
Backup the database:
Follow these steps to take back-up:
• Traverse to Databases node by expanding the tree.
• Right-click the database you want to back up, point to Tasks, and then click Backup Database
 
Backup-Database
 
• In the SQL Server Backup dialog box, specify a name for the backup, select Back-up type – Full, select a destination, and then Click OK to start the backup process.
 
Restore the Backup on SharePoint 2010 SQL server
• Open the SQL Server Management studio, traverse to “Databases” node. Then right click the “Databases” node and choose “Restore Database…” from the context menu.
 
Restore-Database
 
• Specify the Database name, Restore Source, Destination, File names in the screens.
• Click “OK” to start the restore operation and Wait for the restore to complete! The time of restoring database depends upon the database size and server’s capacity.
• Make the Read-Only database to false after restore
 
Create web application in SharePoint 2010
• In the SharePoint Central Administration, click on “Application Management” and click on “Create or extend Web application” under “SharePoint Web Application Management”.
• Again click on “Create Web application”. Set the settings according to the need.
• Don’t create any site collection.
• Install & Copy the solutions, file system changes (like images, themes) from MOSS 2007 to SharePoint 2010 server.
 
Remove content database of the newly created web application in SharePoint 2010
 
Now, we need to delete the content db of the newly created web application in order to avoid any URL conflicts. Run the below stsadm command:
stsadm -o deletecontentdb -url <http://url> -databasename <MOSS2007_Migration_Content>
 
Attach restored database with the newly created web application in SharePoint 2010
• Test the content database: Before attaching the content databases to the Web applications, use the Test-SPContentDatabase PowerShell cmdlet to verify that all of the custom components that you need for that database. It checks for all artifacts such as feature, setup files, web parts etc. that are referred in the content database are installed in the farm and provide you with a report.
• Test-SPContentDatabase -Name <DatabaseName> -WebApplication <URL>
• Delete the corrupted objects
• stsadm -o databaserepair -url <URL of SharePoint site> -databasename <name of database> -deletecorruption
• Attach the Content DB to Webapplication
• Finally, we need to attach the restored MOSS 2007 database to SharePoint 2010 by running the STSADM command
o The Content DB containing the root site collection is always applied first.
o The other content DBs can be applied in any order. Attach the Content DB of the Root Site collection First. And then Attach the Content DBs of other Site Collections.
stsadm.exe -o addcontentdb -url <URL of SharePoint site> -databasename <MOSS2007_Portal_Content>
 
• Or you can use the PowerShell cmd-let: Mount-SPContentDatabase
Mount-SPContentDatabase -Name <DatabaseName> – databaseServer <ServerName> -WebApplicationURL
 
Migrate from Classic Mode to Claims mode
SharePoint 2013 authentication mode is by default Claims mode, so during migration from any previous versions, make sure to migrate authentication from Classic to Claims mode. If the authentication type is Claims already, then ignore this step.
 
Refer this Tech-net guide on how to migrate to claims – http://technet.microsoft.com/en-us/library/gg251985.aspx
 
Post Migration fixes 
Once the content database attachment process is over, we have to manually fix the below things:
• Migrate any List/Site stp’s present from previous version to next version
• Migrate InfoPath forms and change the url ’s to the new url and then publish forms
• Perform the Visual upgrade to get the look and feel of the next version
o Following are the commands used in PowerShell to do visual upgrade
o SharePoint 2010 visual upgrade using PowerShell
 
//Use this for entire webapplication
$w = get-spweb http://server/site
$w.webs | ForEach-Object {$_.UIversion = 4; $_.UIVersionConfigurationEnabled = $false; $_.update()}
 
//Use this for individual site
$web = Get-SPWeb http://server/site
$web.UIVersion = 4
$web.UIVersionConfigurationEnabled = 0
$web.Update()
SharePoint 2013 visual upgrade using PowerShell
Upgrade-SPSite “http://server/site” –VersionUpgrade
 
Similarly to migrate content from SharePoint 2010 to SharePoint 2013, follow the steps from 1 – 8. Once all the operations are done, browse the migrated site and check the functionality.

References:
https://technet.microsoft.com/en-us/library/ee947141(v=office.15)
http://www.sharepointdiary.com/2013/09/migrate-from-sharepoint-2010-to-2013-step-by-step.html
https://technet.microsoft.com/en-us/library/cc262967.aspx 

Monday 7 March 2016

Upgrading from SharePoint Portal Server 2003 to SharePoint 2010 Part 1

In this post I will go through upgrading SharePoint sites from SharePoint Portal Server 2003 to SharePoint 2010 , I will include directions to use the most relevant upgrade approach, as start Upgrade from SharePoint Portal Server 2003 to SharePoint 2010 is really challenging as there is no direct path to upgrade from SPS 2003 to SharePoint 2010,  first it should be upgraded to SharePoint 2007 as first step then to proceed from 2007 to 2010 version.
One of the most important parts that need to be considered is the custom components ,In many cases, SharePoint 2010 has far more advanced and richer user interface elements which would definitely make the need for some of these custom components irrelevant
The other aspect of SPS 2003 customization was related to branding “look and feel” elements such as graphics and style sheets. Because SharePoint 2010 is dramatically different from SPS 2003 and it has the ribbon control it is recommended that the branding be completely redone using SharePoint 2010 native master pages and compliant style sheets. This will be an opportunity for a fresh look and feel for the portal signifying the additional ground-breaking features SharePoint 2010 will be introducing to the customer user community.
The following is one of the common upgrade paths from SPS 2003 to SharePoint 2007:
image
The following is the upgrade steps from the SharePoint 2007 environment to SharePoint 2010:
image
Typically where there are custom solutions like compiled components such as Web Parts and such, it is expected that these components might fail in SharePoint 2010. In some cases these components might seem to work well after the upgrade but it might not be desirable to keep these components in their pre-2010 binaries. For such components it is recommended that they be targeted for the SharePoint 2010 environment and then recompiled after the appropriate testing and validation to make sure that they can live side-by-side with other components in SharePoint 2010 without destabilizing the whole farm.
As mentioned above, there are many factors that make an upgrade from SharePoint Portal Server 2003 to SharePoint 2010 not an easy task. These include some of the following reasons:
  • In-place upgrade are not possible because of the need for 64-bit hardware in SharePoint 2010
  • It’s is a requirement to have an intermediate upgrade to SharePoint 2007 as there is no direct path from SPS 2003 to SharePoint 2010
  • Some custom components might not be compatible with SharePoint 2010
For some of the reasons mentioned above, in this post we will follow an in-place upgrade from SPS 2003 to SharePoint 2007 and then a database attach method into the new SharePoint 2010 farm. The in-place upgrade will preserve as much functionality as possible during the upgrade to 2007. From SharePoint 2007 to SharePoint 2010 we have no choice but to use the database attach method as we cannot perform this upgrade on non-64 bit hardware. Even if it were possible, it better the upgrade to be performed on the final farm in which SharePoint will finally reside.
the following steps illustrates the In-place Upgrade from SPS 2003 to SharePoint 2007
  • Run The Prescan Tool in Production
  • Fix an Issues identified from the Prescan Tool
  • Copy the production database to the Development Environment
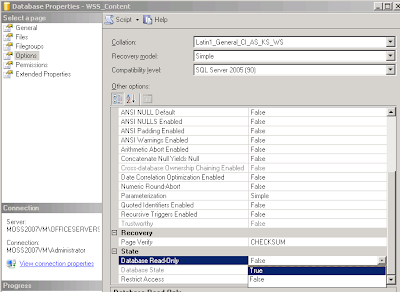
  • Make the Production Database Read-only
  • Start the SharePoint 2007 in-place upgrade in the Development environment
  • Test and validate all functionality and Web Parts in the SharePoint 2007 environment
Database Attach Upgrade from SharePoint 2007 to SharePoint 2010
  • When all functionality has been validated in SharePoint 2007 move the Content database to the SharePoint 2010 function using the database attach method
  • Test and Validate the portal in SharePoint 2010
  • Remove and recreate features using SharePoint 2010 as needed
  • Start the Feature Gap analysis process
  • Enable 2010 Enterprise Search and add all existing Network File Servers as well as all existing internal sites and portals
  • Create dedicated file store repositories for each department mapping or mimicking the current File Server directory structures for each department
  • Enable use of SharePoint workspace in the portal
When performing the upgrade process, Current SharePoint environment should become in read-only mode to make sure no updates are taking place over the online version. Meanwhile, the upgrade process will take place in the lab environment. After a successful migration, the new portal will become available for users and the old environment will be taken offline to ensure that all users start using the new farm.
The upgrade process will be tested in the lab environment to make sure all issues will be identified, fixed and remedied before performing the actual upgrade. The customer team should be confident enough by performing the upgrade exercise more than once to avoid any complications in the actual upgrade process.
Planning is critical to a successful upgrade project. You must be methodical in your approach, because you will have to prepare all of the solution design areas, from requirements analysis to support. Prepare by assembling the right team, which should deliver business, technical, and project management skills. The team must then establish the working practices and resources that are necessary for the upgrade to complete successfully.
image
Learn
Ensure that you fully understand—and your plan reflects—upgrade requirements such as 64-bit hardware and software. Use the available tools to preempt issues such as missing dependencies or lack of storage capacity. You should know and evaluate the update options for your farm or farms. This should include development of a plan for the completion of all of the tasks that are necessary for all of the versions of Office SharePoint that you must upgrade. You must also ensure that your plan reflects business requirements such as system downtime.
Prepare
Your upgrade plan should reflect what you have learned. It must have an exhaustive breakdown of events in chronological order, so that the administrators who implement your plan have all of the correct components in place. This plan should include all prerequisites. It should also include information about how to identify and manage any existing customizations and how to manage individual solutions and items.
Always establish a fallback position. An upgrade failure may be beyond your control, such as a hardware or power problem, so you must have a plan for ensuring that your business users can still work in the morning.
Test
If you are upgrading a business-critical system, you must always pretest your plan; this should be no different for SharePoint 2010 upgrades. If possible, you should build a test environment and test each component of your upgrade. This does, of course, take time. However, attempting to rebuild a business system after a failed upgrade will take longer, and it will cause greater problems for your organization.
Use copies of production data and hardware if possible, but you can sample data and virtual machines to do worthwhile upgrade testing.
Implement
When you have completed your tests and are satisfied with your mitigation plan, you should schedule the upgrade. You should have established how much time the upgrade will take through your test runs, but monitor the progress of your upgrade by viewing the status indicators. This will help you to assess any time differences between your tests and the upgrade exercises.
Validate
Always validate an upgrade by reviewing logs and testing applications. After a long upgrade, it can be easy to ignore apparently minor errors, but you must check everything thoroughly. As part of your upgrade, you should have experienced users who can test the validity of data to reveal any potential issues. You should also test for user experience (UX) in addition to UI changes. Note that the UX concerns the overall familiarity of your applications, and not just the visual changes in the UI. Your user acceptance testing must ensure that users are happy with any changes to working practices enforced by the upgrade. This will be of particular relevance to users who upgrade from Office SharePoint Portal Server 2003 or migrate from third-party platforms.
Planning an upgrade is more complex than planning a new deployment—it has all of the challenges of a fresh deployment and the additional problems of migrating existing business environments to the new platform. This means that in addition to planning to perform all of the installation tasks, you must also plan a complete review of your existing environments.
The list of tasks that you should perform when planning an upgrade includes:
  • Gather business requirements.
  • Plan business communications.
  • Execute upgrade tools to gather information about the current environment.
  • Test the upgrade.
  • Perform environment cleanup.
  • Build hardware.
  • Perform pre-upgrade backups.
  • Establish a project schedule.
  • Test rollback and restore options.
  • Perform post-upgrade activities.
  • Establish launch and ongoing support management.
Now how to choose the upgrade path for your Farm
Migration and Upgrade Resource Center for Microsoft Office SharePoint Server 2007 contains the needed resources for IT pros to help migrate to Microsoft Office SharePoint Server 2007 from Microsoft Office SharePoint Portal Server 2003, Microsoft Windows SharePoint Services 3.0
For more information please follow the link http://technet.microsoft.com/en-us/office/sharepointserver/bb421259
The following table lists and compares different upgrade approaches
ApproachDescriptionProsConsBest for
In-place upgradeUpgrades the content and configuration data in-place, at one time.Easiest approach. Sites retain original URLs. Updates existing databases and servers using existing hardware.Environment is offline while it runs. No ability to revert to original site.Single server or small server farm.
Gradual upgradeInstalls the new version side-by-side with the previous version. The server administrator determines which site collections to upgrade and when to upgrade them.Enables a more granular approach: You can upgrade at the site collection level. Reduces time any single user is affected. Sites retain original URLs. Can revert to original site. Uses existing hardware.More complex and resource-intensive. Must redirect URLs during upgrade process, which causes issues for some client applications such as Microsoft Office. Requires extra storage in Microsoft SQL Server. Microsoft Windows SharePoint Services 2.0 scalable hosting mode is not supported.Medium or large server farms (without shared services) with many sites for which you must limit downtime. If your environment has many customizations and you encounter problems, you can always revert to the original site.
Gradual upgrade for shared servicesThe same as gradual upgrade but with separate upgrade passes to upgrade parent and child portal sites.Same as gradual upgrade, but allows you to upgrade parent and child portal sites individually.Same as gradual upgrade, plus: Two search crawls are active at the same time for the Microsoft Office SharePoint Portal Server 2003 and Office SharePoint Server 2007 environments.Server farm of any size with shared services.
(Advanced) Database migrationRequires the server administrator to install the new version on a separate farm or separate hardware, and then manually migrate the databases into the new environment.Enables moving to new farm or new hardware. SharePoint Portal Server 2003 environment is available and is untouched by upgrade.Complex process that requires many manual steps and a higher risk of error. Requires additional manual steps to retain original URLs for sites. Search scopes must be re-created and search settings must be reapplied. Requires new server farm, and twice the amount of SQL Server storage space.Those who are moving to new hardware or a new architecture.
Those who need to maximize upgrade throughput.
This approach is required for Windows SharePoint Services 2.0 environments that are using scalable hosting mode or Active Directory directory service account creation mode.
Moving from Windows SharePoint Services 2.0 to Microsoft Office SharePoint Server 2007.
Then for your next step of upgrade There are two basic approaches to upgrade: in-place and database attach. In addition, there are various techniques you can use to combine aspects of these basic approaches to mitigate downtime or potentially improve performance.
The following table compares the in-place and database attach approaches.
ApproachDescriptionProsCons
In-place upgradeYou can install SharePoint Server 2010 on the same hardware. You can also upgrade the content and settings in the server farm as part of a single process.Farm-wide settings are preserved and upgraded. Customizations are available in the environment after the upgrade, although manual steps may be required to upgrade or rework them.Servers and farms are offline while the upgrade is in progress. The upgrade proceeds continuously. Consequently, you must allocate enough time for all content to be upgraded in sequence.
Database attach upgradeYou can upgrade the content for the environment on a separate farm. The result is that you do not upgrade any of the services or farm settings. You can upgrade the databases in any order and upgrade several databases at the same time. While each database is being upgraded, the content in that database is not available to users.You can upgrade multiple content databases at the same time, which results in faster upgrade times overall than an in-place upgrade. You can use a database attach upgrade to combine multiple farms into one farm.The server and farm settings are not upgraded. You must manually transfer settings that you want to preserve from the old farm to the new farm. Any customizations must also be transferred to the new farm manually. Any missing customizations may cause unintended losses of functionality or user experience issues. Copying databases over a network takes time and bandwidth. You must plan for that. You need direct access to the database servers.

Saturday 5 March 2016

Step-By-Step: Learn how to restore databases in Microsoft SQL Server

Once you develop a good backup plan for Microsoft SQL Server 2000, you will need to learn how to restore your data when necessary. You might want to restore your data because of a hardware failure or you may want to restore data to a backup or standby server. The reasons are endless, but the most important thing is to be prepared.

Remember that if you are recovering a database using the Simple Recovery Model, then you can restore to only the last full backup. If you are using either the Full or Bulk Recovery Model, you must restore the last full backup and then the last differential backup and all transaction logs that apply. I am going to walk you through the restore process.

Full database restore
Regardless of the recovery model you are using, the first step in restoring your database is to restore it to the last full backup. To restore the database in Enterprise Manager, right-click on the database and choose All Tasks | Restore Database to open the dialog box shown in Figure A.

Figure A


The Restore Database dialog box allows you to view all the most recent backups in chronological order. You can also specify the database you would like to restore or choose a new database. On the Options tab, shown in Figure B, you can choose to eject a tape after the backup completes or be prompted before restoring each backup. You can also choose the Force Restore Over Existing Database option, which is similar to the Move command in T-SQL.

Figure B


You can leave a restored database in one of the following states:
  • Leave Database Operational. No Additional Transaction Logs Can Be Restored.
  • Leave Database Nonoperational But Able To Restore Additional Transaction Logs.
  • Leave Database Read-Only And Able To Restore Additional Transaction Logs.
  • Undo File

After choosing among these options, just click OK to restore the database.

Restores in T-SQL
You can also restore a database using T-SQL, which offers options that Enterprise Manager doesn't. The syntax for using T-SQL commands is as follows:
RESTORE DATABASE { database_name | @database_name_var }
[ FROM < backup_device > [ ,...n ] ]
[ WITH
    [ RESTRICTED_USER ]
    [ [ , ] FILE = { file_number | @file_number } ]
    [ [ , ] PASSWORD= { password | @password_variable } ]
    [ [ , ] MEDIANAME= { media_name | @media_name_variable } ]
    [ [ , ] MEDIAPASSWORD= { mediapassword | @mediapassword_variable } ]
    [ [ , ] MOVE 'logical_file_name' TO 'operating_system_file_name' ]
            [ ,...n ]
    [ [ , ] KEEP_REPLICATION ]
    [ [ , ] { NORECOVERY | RECOVERY | STANDBY =undo_file_name } ]
    [ [ , ] { NOREWIND | REWIND } ]
    [ [ , ] { NOUNLOAD | UNLOAD } ]
    [ [ , ] REPLACE ]
    [ [ , ] RESTART ]
    [ [ , ] STATS [ =percentage ] ]


For a detailed definition of each option, see the description in SQL Server 2000 Books Online. In Figure C, I used T-SQL to perform a full restore of my Pubs database from a backup device.

Figure C


Differential database restore
If you're using either the Full or Bulk Recovery Model, you must perform a full restore and then restore the most recent differential backup and all transaction logs that apply. To perform a differential restore in Enterprise Manager, right-click on the database, choose All Tasks | Restore Database, and then select the full backup and the differential backup and choose OK (Figure D).

Figure D


To perform a differential restore using T-SQL, use the Restore command with the syntax shown in Figure E.

Figure E


Transaction-log restore
Prior to performing a transaction-log restore, you must restore your full backup and last differential backup. Then you can restore all transaction logs in the appropriate order. If you're using Enterprise Manager, right-click on the database, choose All Tasks | Restore Database, and select all the backups and the Point In Time Restore option (if applicable), as shown in Figure F.

Figure F


In T-SQL, use the Restore Log command to restore a transaction log with the syntax as shown in Figure G.

Figure G


End sum
Backing up and restoring data is one of the most fundamental and important aspects of being a database administrator. At this point, you should feel confident in your ability to restore a SQL Server 2000 database according to your disaster recovery plan. If you don't have a disaster recovery plan, I recommend you begin working on one immediately. After all, your company’s data is critical. If something goes awry and data is lost, the next loss could be your job.